Because the super heroes that Wyatt likes are Iron Man, The Hulk, Thor and Captain America, I decided to make the theme be The Avengers. His favorite Avenger out of all of them is Iron Man, so I chose to make the main colors yellow and red.
For Iron Man, I purchased a cut out from Etsy.
For Captain America, I decided to make his shield. I thought it would be simple enough to find cookie cutters, cups, lids (random circular items around my house), to make each off the different rings of colors on the shield, and then just stack each smaller one on top of the last, followed by the star. Unfortunately, it was not as easy as I'd imagined. Stacking them that way made the shield appear to be very thick. What I ended up having to do for the middle layers is essentially cut out their centers, turning them into rings, and then stacking them. This prevented the shield from getting bulkier with each layer.
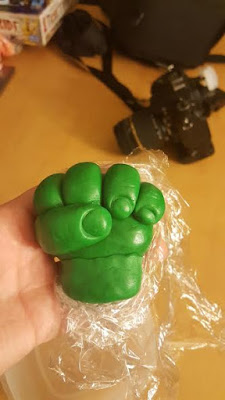
For The Hulk, I decided to make his fist, and have it look as though it was smashing through the top of the cake.
For the finger nails, I used the blunt side of a pair of tweezers, as the shape was exactly what I needed. When I cut the hole on the top of the cake, I used my X-Acto knife, and cut slits similar to what the lid of a fast food cup looks like, where you punch the straw through. It ended up working very well!
The final piece I decided to add was the Avengers "A" logo, just to kind of bring everything together. I found a picture of the logo online, traced it onto parchment paper, and then used my X-Acto knife to trace the outline on to the cake. This way, I could just pipe frosting right on top of the outline. I was pretty happy with how it turned out!
Now don't worry, I didn't forget about Thor! I had decided to try something I hadn't done before. I put the hammer on the inside of the cake. To do this I hollowed out the middle of the top two layers, using a circle cookie cutter, then I hollowed out the middle of bottom layer using a rectangular cookie cutter. I took the cake that I pulled out using the circle cookie cutter and mixed it with some frosting and brown food coloring, and then did the same for the other cake I cut out, but I added gray food coloring instead. I then filled the hollowed out part of the bottom layer with the gray colored cake mix, placed the next layer on the cake, filled that hollowed out piece with the brown cake mix, followed by the last layer and the last of the brown cake mix. So this is what the final cake looked like when you cut into it:
My nephew was so excited! He, of course, had to have Iron Man's face. Not sure why, but he can't get enough fondant. It must be all the sugar! :)
I can't wait to see what his theme request will be next year. It's so much fun to bring his birthday cakes to life!


No comments:
Post a Comment