Pages

Sunday, June 22, 2014

Crossing New Borders

I recently decided it was time to cross over into new borders. As I said in my last post, I had been watching some videos and reading some instructions for making flowers and borders. The borders weren't quite as fun to practice as the flowers, but I now have more options for the next time I make a cake.

The first border I tried was made up of little rosettes, side by side. It was fairly simple, because it was the same motion as a regular size rosette, you just have to keep the shape a lot tighter, and you only make one loop around the center.

Then I tried a rope border, which I really liked, but I think it would take a lot of frosting to go around a whole cake. It was a lot easier than I thought it would be. You just start with the bag at a 45 degree angle, apply a little pressure, and at the same time start moving the tip in a circle in the air, so it looks like a bunch of rings stacked up next to each other.

Little rosettes border (left), rope border (right).

The video I watched to create the rope border is a little different than the Wilton instructions, so I think I will try that one next time and see which one is easier.

The next day I was practicing leaves, and had the idea to use the leaf tip to try a rope border, to see how that would look.

Rope border with a leaf tip

I really liked the way it turned out. Hopefully it will make a nice complement to one of my future cakes. 

The next border I tried was the reverse shell. Basically you start with the bag at 45 degree angle, and you make a bit of a question mark shape. Then you start at the end of the question mark shape, and you do make the opposite shape, almost like a "c" with a tail.

Reverse shell border
After that I decided to try some garlands that I saw in a YouTube video from Global Sugar Art. You use a rose petal tip, and start with the bag at a 45 degree angle and the thin end of the tip closest to you. Then you apply a little pressure, and move the tip up and down, not changing the angle, and as you move the tip up and down, make a wide "u" shape. Then I added a rope border on top of the ruffles. You actually pipe these around the sides of a cake, right next to each other, so it's more of a decoration than a border.

Ruffled garland (top), ruffled garland with rope border on top of it (bottom)

Of all of these borders, I had the most fun making the ruffles with the rope border, because I liked how much dimension and color it had. Unfortunately I'm not as big of a fan of how it looks on a cake. It's a little too frilly for me. Maybe I can come up with something similar, that I can use as an actual border, instead of side decorations. Either way it was worth the effort to venture across these new borders, and I look forward to putting my creativity skills to use and coming up with my own unique designs.

Tuesday, June 17, 2014

Fun Frosting Flowers

I recently bought another book to add to my cake decorating collection, and I think it's probably THE BEST one I have found so far! It's called The Complete Photo Guide to Cake Decorating. I'm sure you can guess why I find it such a great reference: because of all the pictures! This book does a really good job of breaking things down step by step, and including a picture for each step. 

One thing this book also includes, that others I found have not, is tutorials for creating different types of borders for cakes. At this point I've used a lot of the same borders for my cakes so I thought it would be a good idea to learn some more. I had also been watching some video tutorials on YouTube for piping different types of flowers. After all that I really wanted to try practicing those flowers and borders to see if it was really as easy as they made it seem.

I find that it's a bit of a pain to have to color frosting, especially if I'm just practicing. But, I really hate seeing all my work in just a plain white color, so, as my mom would say, I put my big girl panties on and deal with it! ;) However, you'll see that the leaves and violets I was practicing were not green and purple, they were in fact orange. They were the last things I made, and by that time, no, I did not want to make two more colors. Keep in mind I was doing this during a power outage, believe it or not, so that in and of itself made this whole process a little more of a hassle. But that's what happens when you're obsessed with learning cake decorating.

First I made a couple of roses, because they're one of my favorites and I wanted to start with something I know. For one of the roses, I decided to try one of my bigger rose petal tips, just to see what that would look like.


Pink rose with bigger petal tip (left), rose with regular size tip (right)

Then I wanted to try some star flowers and drop flowers when I realized I had the wrong tip (I blame the lack of good light on that one). I took advantage of the mistake though, and practiced making a few stars.

Pink stars

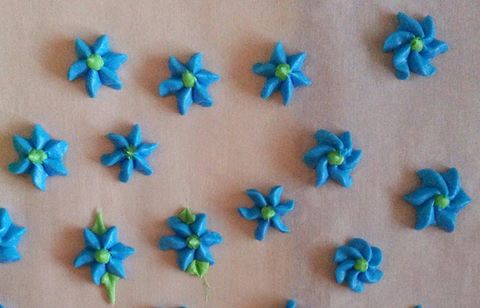
Then I got the correct tip to make the flowers. So for the star flower, you just hold the bag at a 90 degree angle with the tip touching the surface, apply a little pressure until you get the flower to your desired size and then release. For the drop flower the only difference is you twist your wrist a little bit to give the petals that curved-up appearance. So you start with your knuckles at 9 o'clock and then once you start applying pressure you twist them clockwise, and stop when you reach 12 o'clock. Then to finish each of these flowers, you use a round tip piece, and pipe some frosting in the center.

Note: It's really helpful when making flowers (and other designs) to gently place your non-dominant index finger on the other side of the bag from your dominant hand, to just help guide the bag and keep your hand steady.


Pink and orange star flowers
 
Pink and orange drop flowers

I actually practiced those again the next day because I thought they looked so cool. I tried it with blue and green which I really liked.


Blue and green star flowers and drop flowers

After that I decided to try my hand at some more violets, just because they are still the hardest flower I've made so far. It helped being able to make them on the flower nail, because then you can spin the nail, which is a lot easier on your wrist. My biggest problem is trying to get the first petal to be the right size, and then spacing out the rest evenly, because I almost always had barely enough room for the fifth and final petal. However, the more times I did it, the better I got.

Violet

For the leaves, I wanted to try to achieve two different types of "looks," from a YouTube video I had watched. One was a leaf with a smooth appearance, the other had a bit more of a ruffled appearance. For the smooth appearance you start with the bag at a 45 degree angle, apply a little bit of pressure, until you get the desired width for the leaf. Then you start easing up on pressure as you pull the bag back, then stop and release. For the ruffled leaf you do the same thing, but as you're pulling the bag back, you just move it up and down slightly to create a bit of a ripple in the frosting.

Note: You might have noticed in the first picture, I went back and added some leaves to one of the roses just to see how they look on a flower.


Smooth leaves

Ruffled leaves

I actually liked the way the orange leaves looked with the pink roses. I think next time I'd like to see what blue roses would look like. I'm definitely a fan of making things in non-traditional colors. :)

Stay tuned for my next post and I'll tell you about the different borders I tried!

Wednesday, June 11, 2014

Awesomely Geeky Cupcakes

My boyfriend's birthday was coming up soon, so of course I planned to make him some kind of cake or cupcakes. Now, he is a little bit of a geek (as am I), so originally I thought I should make him a Minecraft cake, because he loves that game (and has gotten pretty good too I might add). But then it occurred to me that it would only be one thing that he loves, and I really wanted to the chance to incorporate a bunch of things he loves. So, I decided to make him some cupcakes, each one with a different geek-related theme. :)

Because I was going to make 6 completely different cupcakes toppers, and would need a fair amount of fondant in many different colors, I opted to try out Wilton's ready-to-use fondant. It definitely saved me some time because I didn't have to make it and it freed me from the hassle of having to make all those different colors.

Unfortunately, it was not as easy to work with as the marshmallow fondant. It was stickier, believe it or not, and it dried out really fast. The colors were very vibrant, but that being said, the taste of the colored ones was NOT good. The taste of the white fondant wasn't too bad. In the end I think you just have to weigh the pros and cons and figure out what the best option is, and that might change sometimes, depending on what you're making and what your time constraints are.

For the Batman cupcake, I was able to take the same approach as I did with the corgi; I traced the picture on to parchment paper and then used that to trace it on to the fondant and cut it out (this was just the black piece of course). Then I cut out an oval shape in yellow fondant and placed the batman symbol on top.

Fondant Batman symbol

Everything else was freehand (other than the Mario star, for which I used a cut-out).


Geek-themed cupcakes

The Yoshi egg was surprisingly the most difficult shape to make. Trying to get the bottom half to slope out, so it truly looked like an egg, was a little frustrating. Pinching the top portion obviously created an uneven appearance because it leaves fingerprint indents. What I found worked the best was actually turning it on its side (after making it into an even oval shape), placing one finger on the upper 1/3, and rolling it back and forth while putting just a small amount of pressure on it, so that it starts to get a little skinnier at that end.

Fondant Mario icons

For the Minecraft character (the Creeper), and the Lego blocks, I realized this a little too late, but I think it would have worked better to use a fondant smoother to get a more even shape of each square or rectangular piece. I used my hand to try to flatten each side, which worked well enough, but hands obviously are not completely flat.

Fondant Minecraft Creeper

Fondant Lego blocks
For the McDonald's French fries, I drew them on a piece of paper first, just to get an idea of how it might work, which really helped. Then when I cut it out of the fondant by hand, I actually planned to place the red box on top of the just bottom portion of the fries (going for more of a 2D image) but when I did this it looked a little odd, because the box stuck out a lot further than the fries. So I cut out a back piece for the box, placed that behind it, and cut out two side pieces to connect the front and back ones, creating more of a 3D object.

Note: When you're working with all these different pieces, and there's some time between when you create one piece and when actually finish the entire product, it's really important to put some shortening on whatever surface you're storing the pieces on until you use them again. This way when you go to pick them up again, they will not have adhered to the surface already.

Fondant French fries

I had a lot of fun making every one of these cupcakes - and I think Steve definitely enjoyed eating them ;) But if I had to pick just one, the Mario mushroom was most certainly my favorite! It turned out so well, and it's the most recognizable Mario symbol, and I grew up playing quite a few of the Mario games.

Friday, June 6, 2014

Corgi Cake

It didn't take long after Memorial Day weekend for me to find another good excuse to make a cake for someone. My boyfriends sister was nice enough to watch our dog for us while we were at my parents cabin for Memorial Day, so as part of our thank-you to her, I thought I should make her a cake.

I wanted the theme of the cake to appeal to her, so I figured I should make her either a cake with a corgi, because she loves corgis, or a Gus cake, because Gus is her kitty, who she named after the mouse on Cinderella. Love it! :)

In the end I decided to go with the corgi, because it seemed fitting given that I was making her the cake for watching our dog.

I of course started by searching on Pinterest for dog cakes and corgi cakes. I found one corgi cake in particular that I thought was pretty cute, and resembled an actual corgi quite well. So I ended up using that picture, and tracing the dog onto parchment paper.

Then, after I rolled out the fondant, I put the piece of parchment paper on top, and used one of my fondant tools (see picture below) to trace the outline of the dog, pressing just hard enough to make an indented outline in the fondant. I used the outline to then actually cut out the whole piece.


I did this with the main body, the front legs, and the white patch of fur along the forehead/nose. I cut out the inner ear and tongue pieces by hand. Then I just used chocolate frosting for the nose and the eyes. The first time I did that was simply because I was only practicing and I mainly wanted to see if my idea would work, and I was more concerned about making the main parts of the body versus the nose and ears. But when I practiced it the second time I make those pieces out of fondant as well, and it turned out that I actually preferred the look of the nose and ears as frosting instead.

I also did not have the time to make brown fondant the first time I practiced the corgi. But like I said I was more concerned about making sure this whole tracing concept would work. However, I did still want to see how the different body parts lined up, thus I did not want to have every piece be white. So I figured the easiest thing to do would be to use some of the Wilton Color Mist ;)


Blue fondant corgi

I was happily surprised at how cute it still looked, even in blue.

I ended up making the final corgi (for the actual cake) a day in advance, which you can do as long as you keep it in a tightly sealed container and store it in a dark place. This made it a lot easier to get everything else done the next day.

For the main color of the cake I opted to go with teal, and then purple for the border. I had never done those colors together before but I really liked the way it turned out.

Finished corgi cake

I figured that little brown dog bones and paw prints scattered around the corgi would be a nice complement.

Hopefully my next puppy themed cake (whenever that may be) turns out this well!

Tuesday, June 3, 2014

Memorial Day Cupcakes

When Memorial Day weekend came along, and I knew I'd be up at my parents' cabin with all of my family, I wasted no time using that as an excuse to make some fancy treats for everybody. Plus I had already seen some really cute ideas for Memorial Day themed cupcakes.

I thought because I had some practice with both frosting and fondant at this point, that I should try to incorporate both.

I of course went with red, white and blue colors for the frosting. As for the fondant, I wanted to do more than just stars (the most obvious Memorial Day shape), so that I could have some more practice making shapes. So I came up with a bunch of other things that come to my mind when I think of Memorial Day weekend.

In the end I decided to go with a sail boat, a flower and an ice cream cone. The sail boat is because a lot of people partake in water-related activities for Memorial Day. The flower is because Memorial Day is nearing summer, when there are a lot of fresh flowers popping up, and the ice cream cone is because a lot of people indulge in summer treats that weekend.

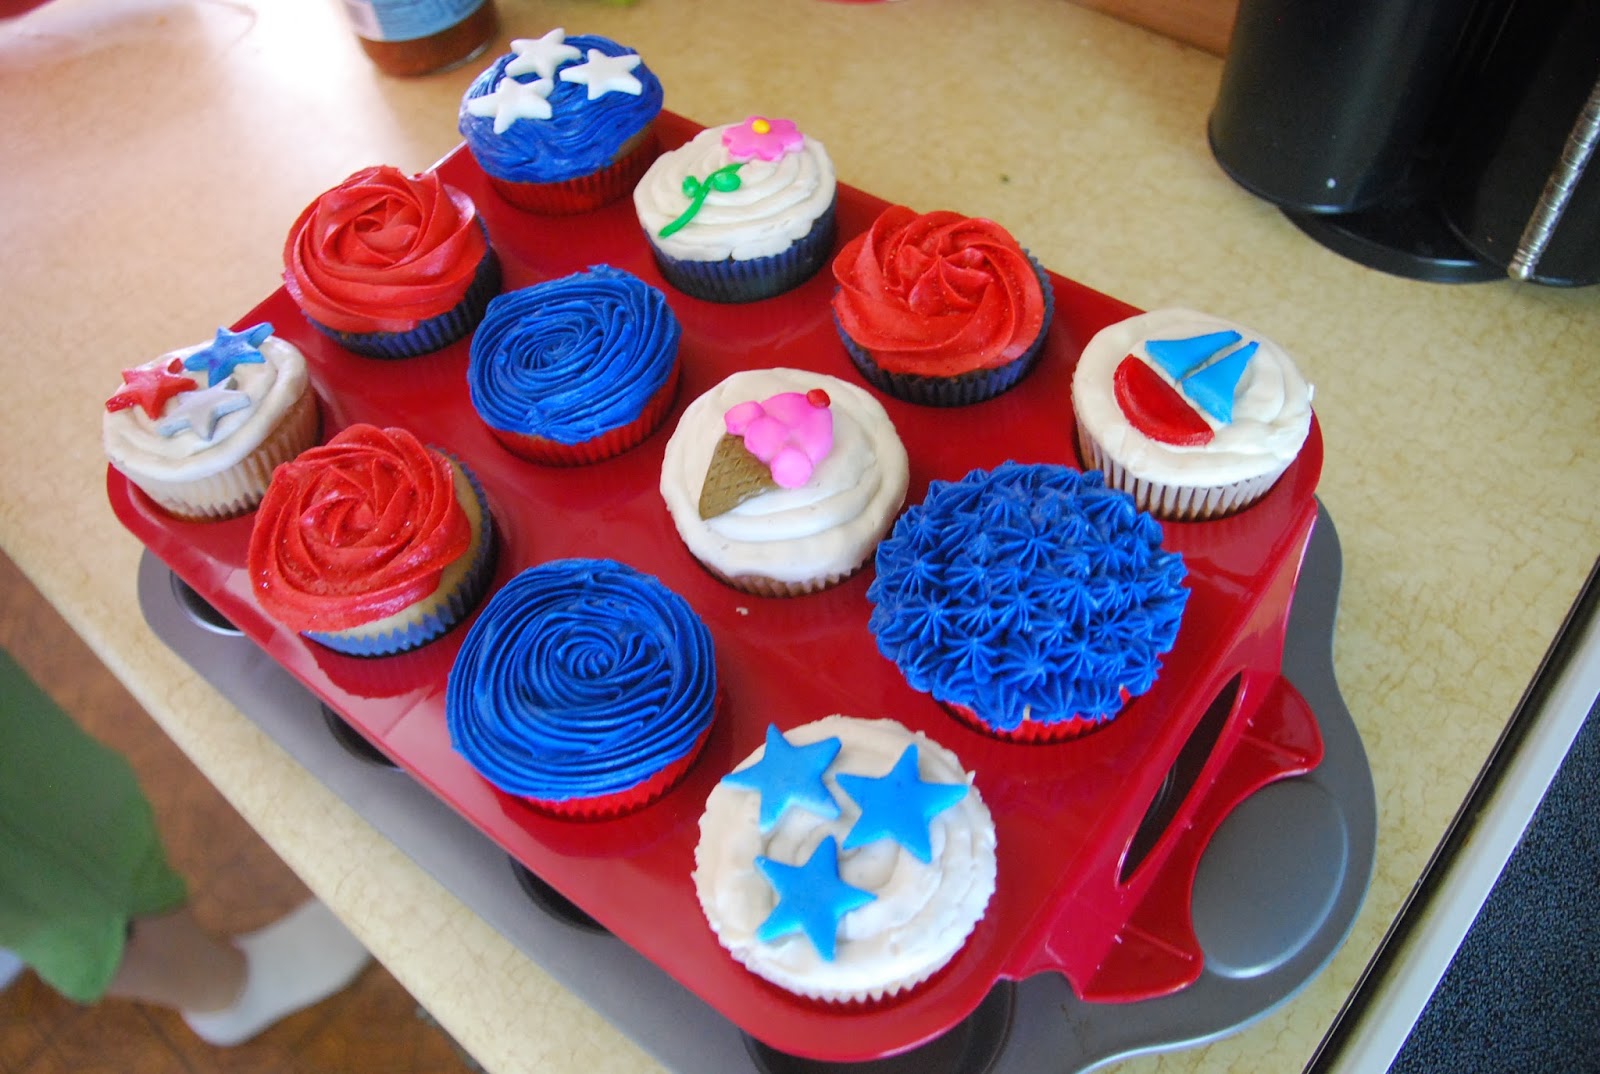
Memorial Day themed cupcakes

The stars and the flower itself were both cut-outs. The stem of the flower I did by hand, as well as the cone and the sails of the sail boat. For the ice cream, I actually used one of the frosting tips, the bottom side, to make the big circle, and one of the candy eyes that I used to make the minion character a couple weeks earlier. For the bottom of the sail boat, I used the top of one of my gel food coloring containers, and then just cut that circle in half. You'd be surprised at the random things you can find to cut shapes out of your fondant.

Fondant sail boat

For the bottom of the sail boat, the red star and the cherry on the ice cream, I painted on the gel food coloring. I wanted that really deep red, so I hardly added any water to the food coloring. I also painted on the green for the stem of the flower and yellow center. But for the flower itself, the blue sails, the ice cream, the blue stars and the one silver star, I used the Wilton Color Mist.

Note: When using the color mist, make sure the fondant isn't too wet (from shortening) or too dry, or you will get some patches of white spots because the color won't stick after it dries.


Fondant ice cream cone

Blue fondant star

On some of the cupcakes, the frosting was just too pretty to be covered up with fondant, so I left those alone. I really liked the way the red rosettes turned out. I even added red sprinkles to some of them for a little sparkle. I also added a star in the middle to one of them, just to see what that would look like. I don't mind it, but I'm partial to just the rosette by itself.

Red rosette

Red rosette with star on top and red sprinkles

My nephew really liked one of the blue ones, because it "looks like hair" (the one at the bottom of the picture below), and immediately claimed it as the first one he would eat :) There wasn't a specific "look" I was trying to achieve with that cupcake, just trying something new.


The other blue ones I made pretty much the same way I made the red rosettes, but using a smaller tip instead.


In the end I was pretty happy with the way they all turned out. I look forward to finding my next excuse to make more treats! :)