Pages

Thursday, June 18, 2015

Disney Frozen Cake, Continued


At this point the cake had been coming together quite well, and I was super pumped to add Olaf and Sven. I start with Sven, first gently placing his head in the pile of snow that I had piped out with frosting, which is now dry enough to provide a sturdy base, but still pliable enough to have objects placed in it. Then I added his two front legs, sprawled out in each side, making sure that everything was well-anchored, and that the antlers had enough snow (frosting) behind them to ensure they would not break. Then I made little snowballs out of fondant and placed them all around his head and legs.


Now it was time to add Olaf. I wanted him to be as sturdy as possible, so I decided to put him in a pile of snowballs as well, to help keep him from falling over. I used a toothpick inserted into his body through one of his feet and put the other end of the toothpick into the cake. Then I added some fondant snowballs around him, like I did for Sven, to get a more realistic effect.

My original plan was to somehow give Olaf hands, but that proved to be much too difficult because of how thin they would have to be and therefore very fragile. Instead I opted to let people assume that he has hands, by putting objects in his hands instead. I managed to attach one of the snowflakes to one side and a snowball to the other. Mission accomplished! Unfortunately, in the process, the 3 hairs on his head broke off, not overly surprising but disappointing nonetheless. My solution, which I had no idea how successful it would be, was to go buy some chocolate frosting and pipe that onto his head with a very small tip. As luck would have it, that worked wonderfully; he looked perfect!


I had then intended to put Violet’s name, made of fondant, on the cake board itself. At the last minute I decided to put it on the top layer instead, so that it would be more visible if you’re looking at the cake from the front. I thought propping the “2” up against the pile of snow was a nice touch as well, versus putting it down next to her name.


Even though the cake was supposed to be finished at this point, I decided that it was missing something. The more I looked at it, the more I thought it needed a little more color on the bottom half, and that color should be pink. So I ran out to the store again and bought some ready-to-pipe frosting. Needless to say, at that point I had no intention of making more frosting and I knew it would be such a small portion of the cake, so I wasn’t worried about it affecting the flavor.

As soon as I had piped the last pink dot, I knew that had done it. Now it was perfect. 


The next day we drove down to my grandma’s house, where we would be celebrating. I carried that cake (in a cake box) on my lap the whole way there, guarding it with my life. And when Violet (and my sister) got to see that cake, it made all of the effort and hard work completely worth it. They were ecstatic! Those smiles were all I needed. But I won’t lie, I also enjoyed watching Violet point and shout with joy, diving into the cake the moment her momma let her go, once everyone had gotten their share of pictures. I feel like I’ve set the bar a little high for myself this time. I can only hope my next big cake will turn out this well!


Sunday, May 31, 2015

Disney Frozen Cake

Sadly it has been a while since I have posted. I find myself having much less free time so it's either perfecting my baking and decorating skills or blogging about it, and since the former is the more important part it tends to win out. I did, however, really want to find the time to post about the cake I made for my niece's birthday this year. It was the most intense cake I've done to date. It was also the second cake I ever made for her birthday, as the one last year was what prompted me to take on this endeavor in the first place. That said, it was a bit of a testament to how far I've come.

This was my niece's second birthday, and her latest obsession, shared by many young children, and even adults (I admit I am one of them), was the Disney movie Frozen. So I started with my usual routine, and logged on to Pinterest to see what was out there for inspiration. There was quite a wide variety, but definitely a lot of over-the-top phenomenal cakes. I wanted to shoot for one of those cakes. I figured I'd had enough practice at this point, and besides you never learn anything without challenging yourself.

I planned it all out; I would start way ahead of schedule, giving myself enough time to get everything done. I prepped the fondant figures first, starting with Olaf. He was actually so much fun to make. I was surprised how much the final product really looked like him. I also found a good tutorial on Pinterest for Olaf, which was very well done, I highly recommend using it.

Fondant Olaf, minus one arm, to be added after the rest dried.
Then I made Sven - well, part of Sven, as I had decided from some of the other cakes I had seen that I really liked the ones that had him sticking out the side of the cake covered in snow. That and it saved me from having to make his whole body. 

If there's a good tutorial for Sven out there I am not aware of it; my strategy ended up being just browsing through the cakes and looking for the simplest looking yet still visually appealing version of him. The absolute hardest part of him was the antlers. They were extremely fragile and I unfortunately had to redo them a few times. In the end what worked the best was making each antler (left side and right side) and then using a small ball of fondant to attach them to the back side of his head. In other words, placing the antler on the back side of the head and then placing the small ball of fondant over the back of that to get it to attach firmly. The reason for this is the antlers are too skinny and fragile to be able to adhere them to the head simply by pressing it on, or to simply use a little water or edible adhesive; it needed something to stabilize it.

All the parts of fondant Sven, to be put together another day when attaching him to the cake.

I also prepared the snowflakes ahead of time, which I made using fondant cutters from Amazon. I stored all the pieces in a tupperware container, and they stayed fresh the whole time, which was about a month.

I then had to decide how to incorporate Elsa and Anna, because they are Violet's favorite characters, so an absolute must-have in my mind. I haven't had much practice making fondant people yet, and of all the ones I've seen I really like the most realistic looking ones. That was a feat I was just not ready to master, at least not yet, as it would've required a lot more time for me to get up to my perfectionist standards. So I did a little shopping around and I found some edible pictures of Elsa and Anna on Amazon. They were actually intended for cupcakes but they turned out to be perfect because I wanted it to go on the side of the cake and therefore the height needed to be small enough to fit.


Edible Elsa and Anna pictures.

This would also be my first two-tiered cake, which I knew meant that I would need cake dowels to place inside the cake. I ordered those from Amazon as well. Clearly that site has been very useful for many of my cake decorating needs, as the craft stores around here don’t always have every specific thing I’m looking for. I ordered plastic ones, which I had to cut, because they were way too long, but I know that’s typical. I regular scissor worked alright, but I found that the heavy duty wire cutter that my boyfriend had in his toolbox worked much better.

I decided to make the big bottom half of the cake ahead of time, to make the whole process a little easier, plus when you only have a few hours here and there, you have to find some way to break it up. I also read that many bakers make the cake itself early and then freeze it until one or two days before, then take it out to frost and decorate it. I wanted to see for myself how well that worked. I made three 8-inch vanilla cakes, and made each layer a different color, so it would look fun and festive when you cut into the cake as well. They were frozen for a week, and I’m happy to report that everyone who had a piece of the cake said it tasted just the same as if it had been baked that day. Next time I plan to try freezing some for much longer, as I have read some bakers have left them frozen for up to 10 months! If that works it would make my decorating life so much easier.

The same day that I took out the bottom layers from the freezer, I also made the smaller top layer. That cake was chocolate so I obviously didn’t color those layers.


Then I rolled out the fondant to cover the layers.


I decided that of all the Frozen cakes I saw on Pinterest, the ones with the fondant looked the most clean-cut. I chose white for the bottom layer, and a light blue for the top layer. The white fondant was from Wilton, and the blue fondant was from Cake Boss, and as much as I loved the blue color of the Cake Boss one, my experience in this case was far better with the Wilton brand. The Wilton fondant was much easier to roll out, and it stayed smooth, while the Cake Boss fondant cracked, and nothing I did made it better (I tried all the tips I could find). I tried to cover some of the cracks with some white dots (or “snowballs,” if you will) but it still has to look somewhat natural and evenly spaced so I chose to cover the bigger ones and left some of the smaller, less noticeable ones. Next time, if I need that color, I will just have to bite the bullet and color the Wilton white fondant since they don’t make that color in their pre-made fondant.

Right before I decided to add the white dots, I placed the edible picture on that top cake. It ended up being really easy to work with. I just brushed a small amount of water on the cake where the picture would go (but not too much or it can make the colors of the picture run together), and gently peeled it off the paper, and placed it on the cake. I smoothed the edges down as much as possible but since it was not on a flat surface the picture did not lay 100% flat at the edges. Luckily all I had to do was make a border around it out of frosting (which I planned to do anyway because I thought it would look nice), and it covered that stuff completely.

Elsa and Anna picture added to the top tier, with a white border.

Then came one of the hard parts: stacking the cakes. I read a few tutorials, which were helpful but I knew the best way to figure it out was going to be just diving in. I placed four cake dowels, in a square shape, in the bottom layer. This is to assist the bottom layer in holding up the next layer, and keeps it from caving in from the added weight. Trying to pick up the next layer, without messing it up, and place it on bottom layer, was much easier said than done. I think I will buy the cake lifter tool that’s specifically designed for that for next time, but for the time being, the best help I had was a spatula. It worked but I had to be very careful. I ended up having to repair a couple of decorations, but they were quite minor. Then I strategically placed the snowflakes around the bottom layer, leaving room for where I knew I wanted Sven to go. I had decided to use a mix of frosting (to ensure full coverage and full adhesion) and fondant to capture the look of him stuck under a pile of snow/snowballs. I piped out a very large glob of frosting, followed by little globs, to look like snowballs.


The final stage of the cake, all prepped for the fondant figures.

I book-ended that pile of snow with a pretty teal rosette border, which I thought fit well with the theme of the cake.

At this point the cake was ready for me to add the Sven and Olaf figures. I decided to leave that part for the following day, as I was extremely exhausted at this point, and probably should've have taken a break a lot sooner. I guess that's what happens when you love to make cakes! Check out my follow-up post to see how I added the final touches to bring everything together!

Thursday, October 30, 2014

Recipe Experimenting: Caramel Apple Spice Cake

My latest creation, like the carrot cake, was not as much about the decorating as it was the baking, because I would like to perfect that art as well. I've tried a little experimenting with recipes in the past, but nothing major, as I know it can be very hard to do with baked goods. However, I was recently inspired to just go for it, and see if I'm any good at it.

I had seen this particular recipe on Pinterest that sounded pretty tasty, so I clicked on it and read through it. It seemed interesting, to say the least, but I was still intrigued. Then, as I continued to look through it, I noticed that the ratings were not good (an average of 2 out of 5 stars). So I started reading the reviews, and most people said it turned out really dry or they just didn't care much for some of the flavor combinations. I looked back through the recipe again and I did notice that some of the proportions seemed a little off. That was when I decided to take what I know about cake recipes and modify this one to improve it.

My goal was to make it a kind of cake that I would want to eat, with all the right flavors, and to change the texture to something more moist and fluffy. First I got rid of chocolate chips. They just didn't seem to fit with apple flavor. The mocha sounded like it might taste okay, but a little risky. I opted to replace it with caramel extract, knowing that my main goal for this first round was to fix the texture, just to avoid having too many different variables affecting the outcome.

I then decreased the amount of flour, while increasing the amount of eggs, as the right balance between these two ingredients help create the best height and texture for a cake. I decreased the amount of apples, because fruit adds a lot of water to a cake, and you need the right balance between wet and dry ingredients as well. I also added some butter extract, because I love butter flavor in cakes, but I think oil makes it more moist, which is why I stuck with the oil.

It turned out AMAZING! The cake was so moist, it would just melt in your mouth. The frosting, which I had never made before, was some of the best I had ever had! It was a browned butter frosting, which is basically regular buttercream frosting except you brown the butter on the stove first and then let it solidify again before using it in the recipe. All the flavors were great together.

Finished Apple Cake - already partially devoured!

I decided to call it Caramel Apple Spice Cake. I landed on "spice cake" because of the fact that it has the cinnamon and nutmeg. I think I might try adding some ginger one of these times too. Overall, I'd say it was a pretty successful experiment, especially for my first try!


Wednesday, August 20, 2014

Despicable Me Minion Birthday Cake

Your nephew turning 4 only happens once! So of course I had to make him an awesome birthday cake that he'd always remember. I happen to love minions too, so I knew this was going to be a fun cake to make!

Deciding to make a minion cake was the easy part. What exactly that was going to entail was more of a work-in-progress. What would the color scheme be? How many minions should I make or how many will fit on the cake without it looking crowded? What should each minion be doing? I obviously didn't want the cake to be too plain, but I didn't want any of the designs to distract from the minions because they were the focus of the cake. Ultimately, I thought that various sized blue and yellow dots around the sides of the cake would be the best complement.

To make things a little easier (especially since the cake had to be ready on a Saturday morning), I made the minions in advance, because if you store them properly they don't go bad, they just might be a little dry. I opted to use the premade fondant this time because right now it's more about learning to work with fondant and getting better at making designs. So I thought it would be best to save myself all the extra time and work to make my own fondant, especially since I don't have that time to spare right now.

I found a tutorial on Pinterest (of which there are many) for making a minion out of fondant. For the eyes, I used candy eyes that I had bought in the cake decorating section of the grocery store, but I turned them around so that the back side was facing outwards. I did this so that the eyes would look flat (because the minions wear goggles, so they look flat) and so that I could put the pupils on myself, and therefore decide which direction the minions' eyes would look (for example, at the little slice of cake).

Fondant minion (in progress)
I can say for certain that making the minions got a lot easier each time I made another one. I was able to get somewhat of a "system" down to make the process go a lot faster too. The hardest part was attaching all of the pieces (clothes, arms, eyes, etc.) and trying not to squish or distort the body while doing so. The biggest part of it is patience because it does take time, and I think the only reason I'm able to be patient is because it's something I love to do. It definitely doesn't mean that I don't get frustrated from time to time though.


Fondant minions and fondant bananas

Fondant minion eyeing a slice of cake

Fondant minion in party hat

My favorite color on the cake was definitely the one for the borders. The picture (see below) doesn't quite do it justice but it's a really neat gray/blue. I was a little worried because I hadn't made that color before and couldn't seem to find anything online about which gel colors to use, but it made sense to me to use black (which would make gray) and the royal blue (because the sky blue would be too light). So that's what I did, and I lucked out and eventually got it to the exact color I had in mind. I will absolutely use that one again.

I wasn't quite sure how orange letters would look on top of the blue, but I decided to go for it because I really wanted them to stand out, and I wanted to pick something less obvious than yellow. Note: It helps to trace the message on the cake with a toothpick ahead of time, so you can get the size and proportions exactly the way you want them. That way if you mess up you can just smooth the frosting over and write it again.

 I didn't put the fondant pieces on the cake until shortly before we were ready to eat it because I didn't want any of the pieces falling over in transit, or the moisture from the frosting causing the colors in the fondant to bleed. I brought some frosting with me in case any of the hair pieces fell off because they were so fragile I assumed it was inevitable. Surprisingly, the hair stayed put. However, one of the arms broke in half so I did use the frosting to reattach that. You just never know when you're going to have to do some reconstructive surgery.


Finished Despicable Me Minion Cake

In the end this cake was definitely the most intricate and labor-intensive of any that I've made so far, but it was also the most fun. I thoroughly enjoyed seeing the look on Wyatt's face when he saw the cake!  It was too cute when he decided he wanted to eat all the little bananas (which I must say were also really fun to make). Everyone said it looked amazing. It was a little funny though when my grandma and sister didn't even want to cut into it because they thought it was too pretty. I'm making another cake this weekend that I think could end up being even more difficult (I won't say too much yet), but hopefully that one turns out just as well!

Friday, July 25, 2014

Carrot Cake: The Art of Trial and Error

My latest cake project was a little less about the decorations and a little more about the actual baking. I had decided to make a carrot cake for a birthday present (since it was this person's favorite kind of cake). As I had never made carrot cake before, I thought I should focus a little more on getting the recipe right because no matter how pretty a cake looks, if it doesn't taste good it's sort of a waste.

The first thing I did was just browse Pinterest for some recipe options. I found a few that sounded good, and one in particular, from Taste of Home, which I've gotten recipes from in the past and have been impressed. The reason this one stood out to me was because it called for brown sugar instead of white sugar, which I thought would create a well-suited flavor for a carrot cake because of the spices in the cake that tend to pair well with brown sugar.

Unfortunately, I can't lie, it didn't turn out too well. However, there were some other factors that could've affected the outcome besides the recipe. When I tasted the cake shortly after it cooled, it was pretty dense, which I expected because brown sugar crystals are more packed than white sugar crystals and therefore don't create as much of a "fluffy" cake. But it was not too dense and the flavor was great.

Anyhow, I was a little pressed for time and was not able to frost the cake that same night, so I tried to cover it the best that I could, but it was late and in my haste to get to bed I did not take into account that some of the bottom half was not completely sealed. I had the cake on some paper towels on top of a cooling rack, but what I forgot was the fact that the paper towels didn't quite cover the whole underneath side of the cake. So, even though I covered the top and sides of the cake with plastic wrap, there was a little bit of the bottom of the cake that was exposed.

In any case, when I tasted it the next day I decided it seemed too dry, and I'm a perfectionist when it comes to things I'm passionate about, so I just could NOT serve it. So I went back to the other recipes I had found, and decided to go with the one from Grocery Budget 101, because it used white sugar instead and even though the brown sugar may not have played a part in the way cake turned out, I didn't want to take any chances.

This one turned out delicious! It was moist yet fluffy, and lots of flavor. The only thing I did differently with this recipe was add a little nutmeg and ginger, because I love how those spices combine with cinnamon and I think they add a little something extra to the aroma of the cake too. I also added a little orange juice to the frosting, which I had thought of because it was one of the frosting ingredients from that previous recipe on Taste of Home. It just seemed like a hint of orange would be a pleasant complement to the carrot cake flavors.

Now of course I did have to add at least some decorations to it, because I like the look of decorated cakes and I wanted the extra practice. I will say that the crushed nuts and sprinkles on the sides of the cake were a bit of an annoyance because of the gigantic mess it made, but at least it looked cool. ;)


Buttercream carrot on top of carrot cake

In the end I definitely liked the way it turned out. Even my boyfriend said it was delicious, and he really isn't a big fan of carrot cake because of the cream cheese frosting. That being said, I think next time I'd like to try half white sugar, half brown sugar, and see how that works, just to try to incorporate some of that rich brown sugar flavor.

Finished carrot cake
Recipes for baked goods are usually pretty finicky, but you can't be afraid to test the waters a bit, and put your own spin on them. Especially if you know a little bit about what each of the ingredients does and the affects they have on the finished product. There's nothing wrong with a little trial and error. Even if something doesn't work out, at least you know for next time. :)

Friday, July 11, 2014

Anniversary Cake: Pearls and Rosettes

I've been browsing some more cake decorating tutorials, from Global Sugar Art and Wilton. This of course made me want to make another cake. Luckily my parents anniversary was just around the corner so I thought it would make a nice present for them.

Note: The video from Global Sugar Art on Buttercream Basics: Making a Cake, has some great tips that make a really big difference on the texture and flavor of cakes.

I really enjoyed the chocolate flavor of the last cupcakes I made, so that made me want to try making a chocolate cake. I also love how well the chocolate flavor pairs with the vanilla buttercream frosting.

Thus far I have made a fair amount of cupcakes with the rosettes on top, but none on a cake, and I just love how cool they look on a cake. Additionally, given how pretty they are, I thought they would be a nice decoration on an anniversary cake.

I really like the look of a cake that has different shades of the same color, which I hadn't tried before.
I opted to go with different shades of blue, because it's one of my favorite colors, and I knew it would be a nice complement to the chocolate color of the cake (which you could see when you cut into the cake).

The cake came out very nicely done, with amazing flavor, just like the chocolate cupcakes had. One thing I will say though is that because this was an extremely moist cake, it also wasn't super strong, so I'm not sure how well it would've held up with more than just the two layers or with heavy fondant decorations. I may need to alter the recipe if I ever need to accommodate those situations.

This was the first time I used all shortening in my buttercream frosting. I did add some butter flavored extract to it though, and it tasted fantastic! However, I may have used just a bit too much powdered sugar because the frosting was looking a little dry when I was piping the rosettes.

I won't lie, making the rosettes on a cake was a little harder than on a cupcake, because you have to try to make them all the same size and it's not like you can use the edges of the cake as a guide the way you do for a cupcake. I think it'll get easier the more I do it though.

I had just bought those blue pearl candies that morning at the grocery store when I went to buy more shortening. They're actually Sixlets, and they were in the decorating section at Target (in the baking isle near the shortening, hence why I saw them). They were the perfect color and I thought they would fit in really well with the rosettes.

After I saw how the pearl candies looked on the cake, that's actually what made me decide to make the white buttercream beads to complement that look on the sides of the cake.

The border around the bottom is a simple shell border, which I've don't before, but this time I used a much larger star tip (1M, the same as the one for rosettes). I like the way that turned out, and I didn't think it was too much of a distraction from the rosettes which were the focal point.

My parents (and everyone else who got to try a piece) loved it, they all had multiple slices! Even my mom, who doesn't eat a whole lot of dessert, said it was delicious. I think that's a sign of success! :)


Anniversary cake, with rosettes and pearls

Monday, July 7, 2014

Sweet Edible Nature: Fondant Fruit and Frosting Flowers


For my latest cake decorating creation, I opted to make cupcakes, since it had been a while. I also wanted to make multiple flavors and decorations, something I've always loved about cupcakes. I think that's one of the reasons they're so popular; they can be easily catered to many different individuals.

I ended up settling on a little bit of a nature theme, since the person I was making these cupcakes for likes a lot of things in nature. I chose to make the cupcakes ahead of time in order to space things out a bit so that I wasn't trying to do everything in one day. It helped a lot!

Half of the cupcakes were vanilla, the other half were chocolate. I got both recipes from Pinterest (of course). The vanilla one was from a blog post called The Ultimate Cupcake Guide, in which the author tests different versions of the same recipe (changing only one variable each time) to see what makes the best cupcake. She seemed to really like the one in which she added an extra egg yolk to the recipe, so that's the one I went with. It was good; very flavorful and not overly sweet. However, the texture was a little dense for my taste. I think I will try the traditional recipe next time.

The chocolate recipe was from a blog post called A case of the horrible, no good cupcake day. I was a little nervous about them though, because when I mixed the batter the consistency was really thin, almost the opposite of the yellow cupcake batter, and I was worried they weren't going to bake right. But I triple checked the recipe and I hadn't made any mistakes so I decided to go with it. They turned out amazing! They were super moist, yet light and fluffy, and the chocolate flavor was rich but not too sweet. I will definitely use this again! They also paired really well with the vanilla frosting :)

A lot of these decorations, especially the flowers, were inspired by ones I had seen on Pinterest and really wanted to try. I don't like to replicate things exactly the way I see them though, just to challenge my own creativity.

Nature-themed cupcakes


Purple rosette
Blue drop flowers
Small pink rosettes
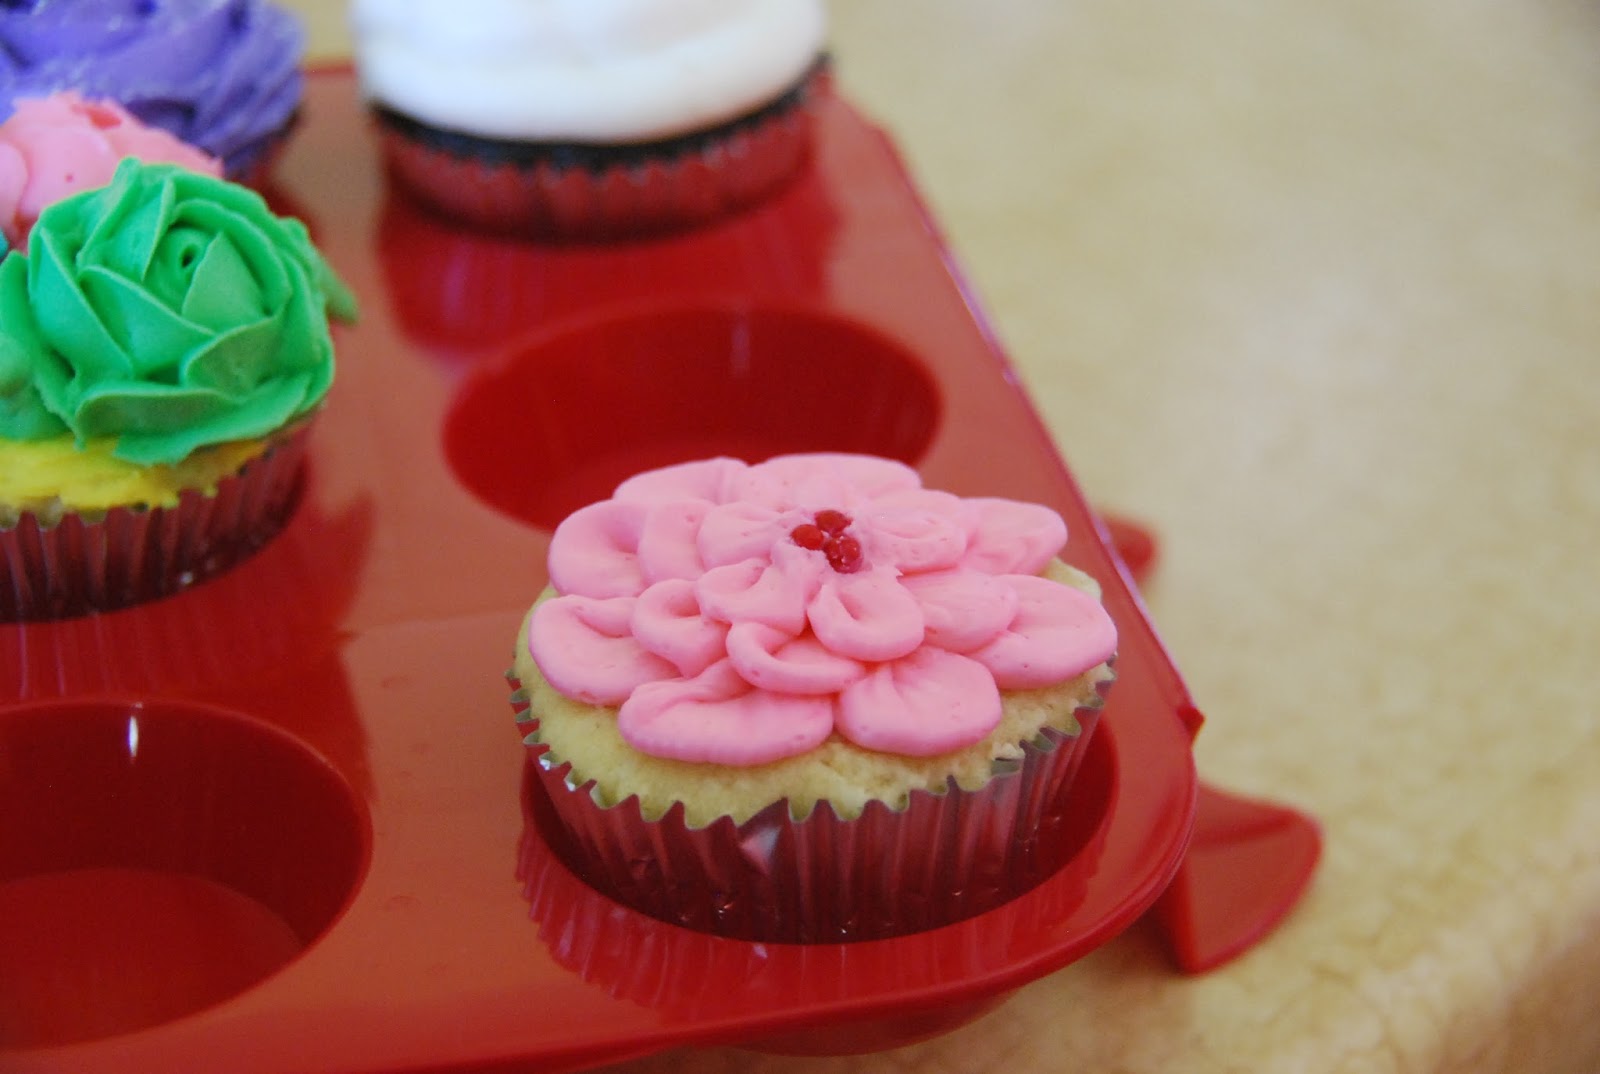
Pink layered flower
Fondant bluebird with fondant raspberry
The apple one, the cherry one and the pink rose one were my favorite ones to make. The apple cupcake was fun because I knew I was going to have to figure out how to shape the frosting so it looked like an apple, and I really liked texture and appearance from the red glitter and sprinkles. I also filled the center of that one with apple butter, which turned out really well.


Apple cupcake
 The cherry one was a little difficult, because I was trying to make the shape as realistic as possible. I like the way that whole cupcake turned out though. I like the simplicity of the design, and that it still looks visually appealing.


Fondant cherry topped cupcake
 
I like the pink rose one because it was a design that I just threw together, without ever having tried it before. I think it turned out really pretty, and a little old-fashioned, which I like sometimes.


Pink rose with purple border
The one with the little flowers on the grass was actually a little more difficult to make than I anticipated. I think the problem was that I should have changed the consistency of the frosting for that particular frosting tip (Wilton grass tip 233). I had to apply too much pressure in order to get the frosting to come out and therefore wasn't able to hold it as steady. So the pieces of grass are not all the same width from top to bottom. I should have added a little water or milk to thin it out.
 
Pink star flowers on grass.
I think in the future I will do more than one of the same cupcake, versus all different cupcakes. The reason I didn't do that this time is because I was so anxious to try different designs and I need the practice, but there were just too many different tips required, combined with too many different colors. It made for a big hassle and a lot of clean-up! I still had a lot of fun making them though, and it was worth it because I know more about what to do - and what not to do - for next time.